HD580 Agricultural Drone
Warranty Manual
Version 3.0 2025.08

1. Warranty Policy
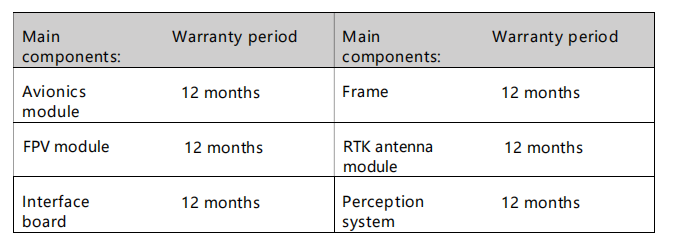
1.1 The entire product has a one-year warranty, and the main components have the following specific warranty periods:
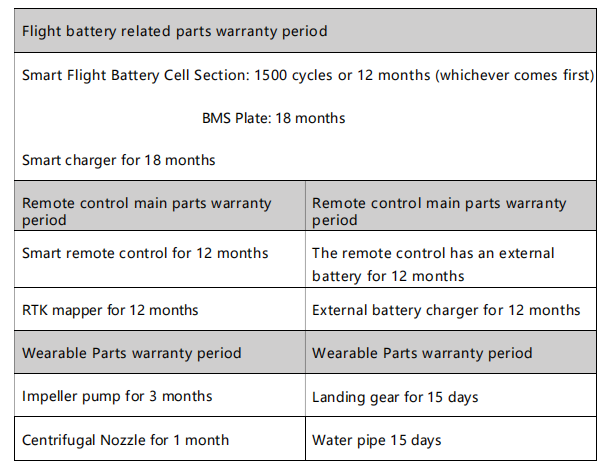
1.2 Warranty Period for Other Components and Wearable Parts

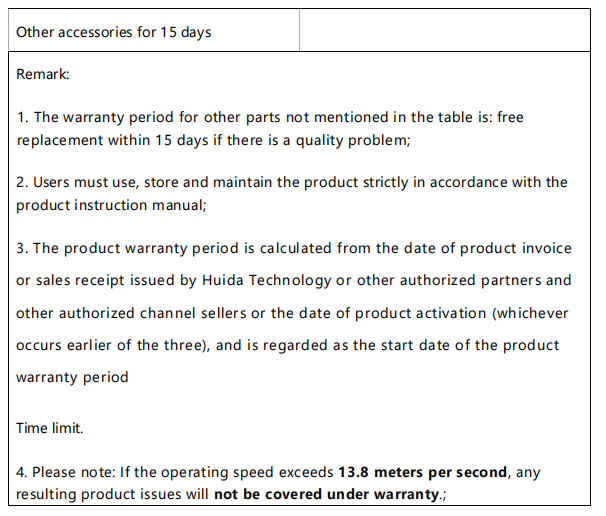
1.3 Warranty Exclusions
The warranty does not cover the following situations:
- Damage not caused by the product itself, such as damage from collisions, crashes, or fire
- Damage resulting from installation or disassembly not performed according to the official user manual
- Damage due to improper installation or misuse
- Damage caused by unauthorized modifications or misuse of batteries or chargers
- Damage from flying the drone in ways not in accordance with the user manual
- Damage caused by operating in extreme weather conditions (e.g., strong winds, sandstorms)
- Damage from operating in areas with electromagnetic interference (e.g., mining zones, communication towers, power lines, substations)
- Damage caused while using the drone when wireless devices (transmitter, video transmitter, Wi-Fi, etc.) are malfunctioning
- Damage due to exceeding the drone’s safe takeoff weight
- Damage caused by forced flight while knowing components are damaged
- Damage resulting from the use of unauthorized third-party components due to compatibility or stability issues
- Damage caused by insufficient battery power or intentional use of defective batteries
2. Product maintenance suggestions
2.1 Product Maintenance
Storage & Transportation
- Keep children away from the drone components, as cables and small parts may pose a hazard.
- Always remove the battery from the drone before transportation.
- For long-term storage or long-distance transportation, remove or empty the spray tank and store the drone in a cool, dry place.
- The drone should be stored in environments between -20°C and 40°C, and there must be no liquid left in the spray tank, flow meter, liquid pump, or hoses.
Cleaning, maintenance and upkeep
- After each day’s operation, allow the drone to return to room temperature before cleaning.
Do not clean the drone immediately after use.
a. Fill the spray tank with clean water or soapy water, spray it out completely, and repeat three times.
b. Remove and clean the tank filter to ensure it is not clogged.
c. Use a soft brush or damp cloth to clean the drone body, then dry any water stains with a dry cloth.
d. If there is dust or pesticide residue on the motors or propellers, clean with a damp cloth and then dry.
e. Store the drone in a dry place.
- After daily operations, wipe the surface and screen of the remote controller with a clean, damp cloth (well wrung out).
- Every 20 flight hours or 100 takeoffs/landings, perform the following checks:
a. Check for cracks on propellers and replace if needed.
b. Check if propellers are loose; if so, replace with new propellers and spacers.
c. Inspect plastic and rubber components for aging.
d. Check nozzle atomization performance. If atomization is poor, clean the centrifugal disk thoroughly; if still unsatisfactory, replace with a new disk.
e. Replace the spray tank filter.
f. Repeat the spray tank cleaning process (3 times with water or soapy water).
- Do not attempt to repair modules or batteries yourself. If damage is found, please contact XAG technical support or an authorized dealer.
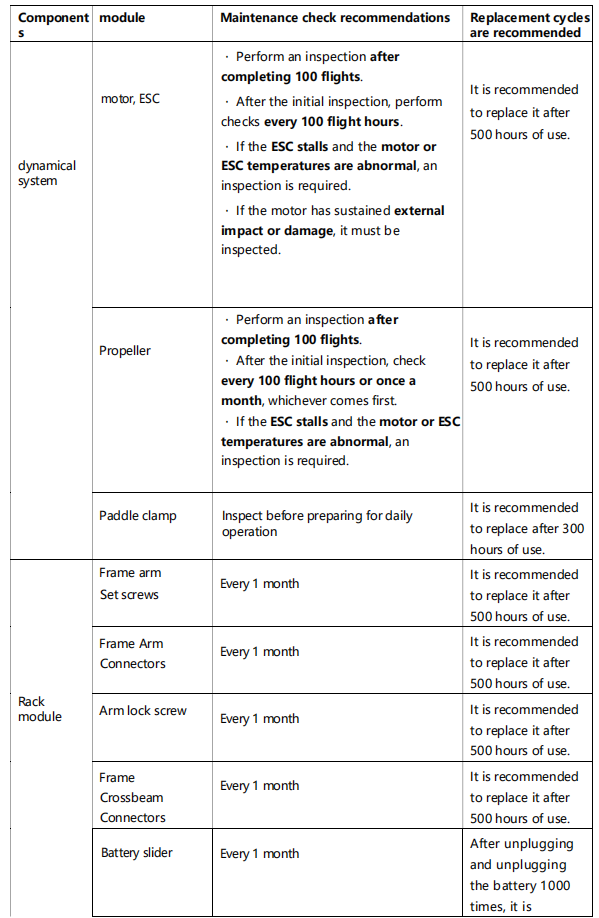
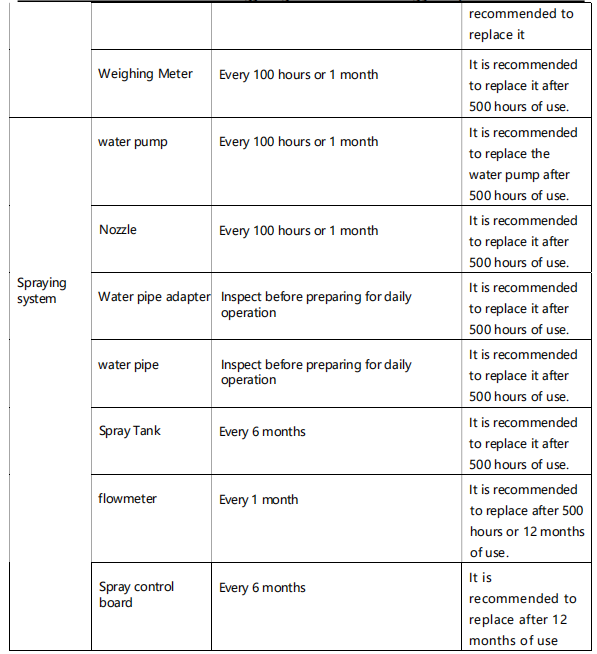
2.2 Recommended Maintenance Schedule