Agricultural Drone Instruction Manual
Centrifugal nozzle configuration
Version 1.0

1. When the new drone is activated or the centrifugal nozzle is repaired and replaced, the centrifugal nozzle configuration shall is required.
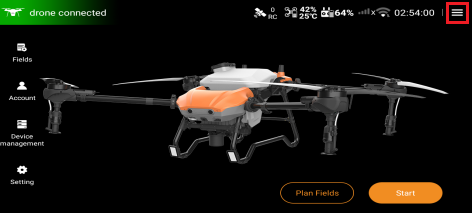
2. Enter the home page of Huida Drone APP, click the hamburger menu in the upper right corner to enter the next level.
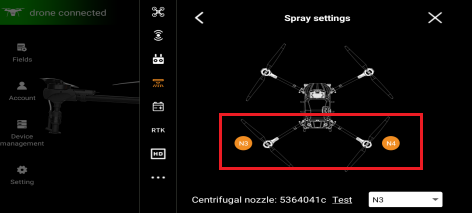
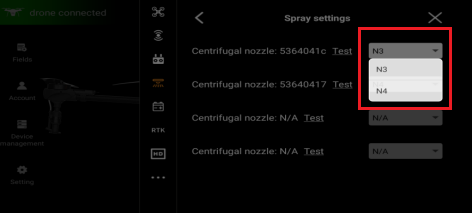
3. Find the "Spray Settings" interface, click the "Nozzle configuration" function option to enter the configuration interface.

4. As shown in the figure, this drone is a dual centrifugal version, and only two nozzle configurations of N3 and N4 are displayed.
5. N3 corresponds to the centrifugal nozzle on the 3rd arm, and N4 corresponds to the centrifugal nozzle on the 4th arm.
6. Swipe up on this screen to find the centrifugal nozzle test interface.
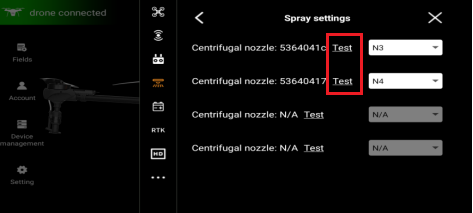
7. The self-recognized centrifugal nozzle number can be seen in the nozzle test interface.
8. Click the "Test" function option next to the centrifugal nozzle number at the top, and the system will issue a test command to the centrifugal nozzle.
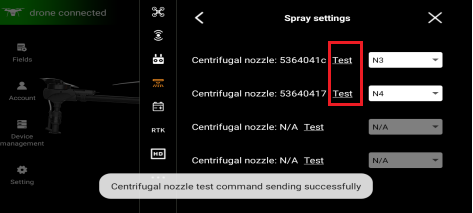
9. If the centrifugal nozzle spray disk on the 4th arm rotates after issuing the test command, select N4 in the corresponding address option bar on the right.
10. At this time, the message "Centrifugal nozzle addressing setting successfully" will be displayed on this interface.

11. Repeat the same steps to configure addresses for other centrifugal nozzles.