.png?height=120&name=Pegasus%20Robotics%20Logo%20-%20Portait%20(2).png)
Semi-Direct RCN4G Configuration
Use condition
4G network coverage
Applicable models
P100PH/P100H/P40EN/V40EN
Semi-RCN4G Device Pairing requirement

|
Semi-Direct RCN4G |
||
| 4G SIM inserted? | Wi-Fi | |
|
UAV |
N |
Connect to RC |
|
RC |
Y |
AP |
|
Smartphone/Pad |
N/Y |
Connect to RC |
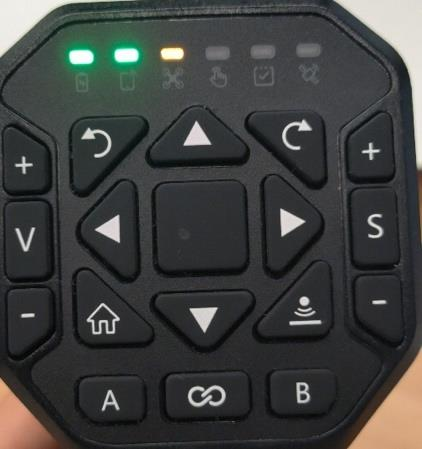
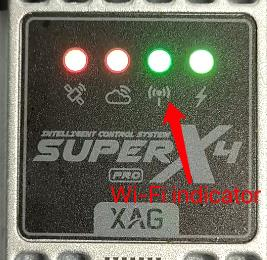
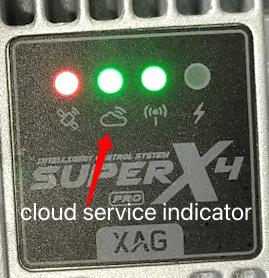
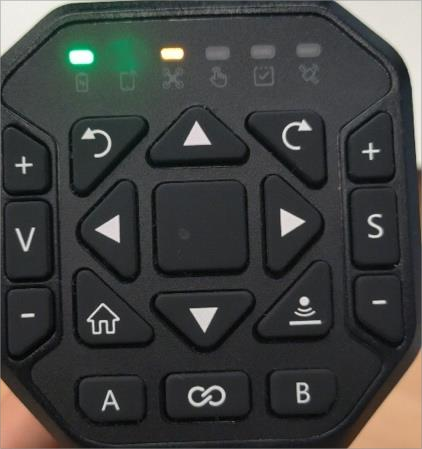
Remote controller (RC) has a 4G SIM card inserted a.Second light (Cloud IOT) illuminates green
UAV has no SIM card inserted.
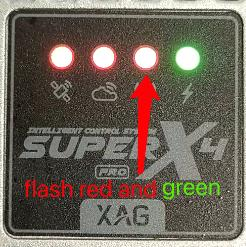
- Second light (Cloud IOT) flashes red
- Third light (WiFi) flashes red
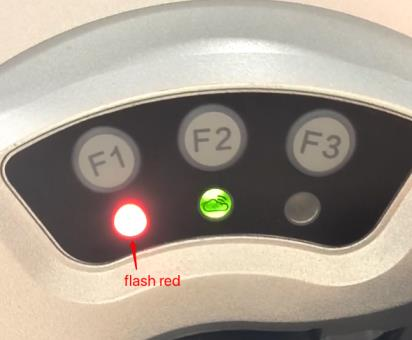
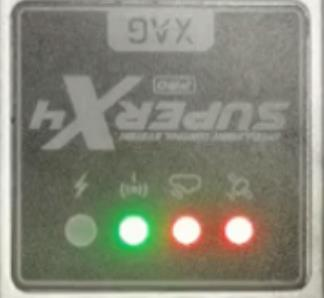
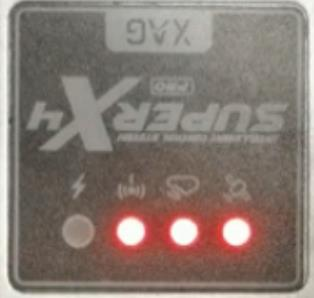
XRTK4 has no SIM card inserted
- F1 light illuminates red
- F2 light single flashes green
Smartphone/Pad do not need 4G SIM card
Procedure: Semi-RCN4G Pairing
1. Add Remote controller to XAG One Account a.Insert 4G SIM card into remote controller
- b. Second light (Cloud IOT) illuminates green
- c.Update the remote controller firmware, make sure the RC board version is above 2.1.1.40 and the Wireless Communication version is above 3.2.1.52.
- d. Turn off remote controller
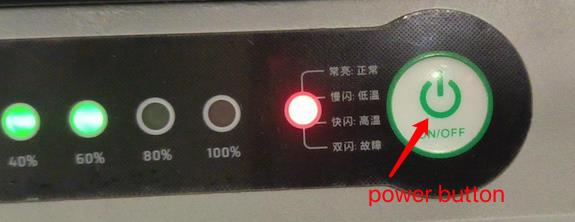
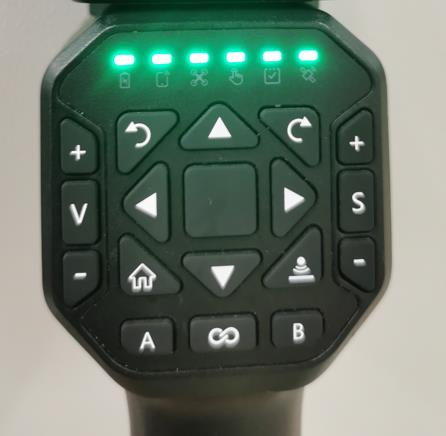
- e.Long press the power button of remote controller until all six LED light indicators flash green
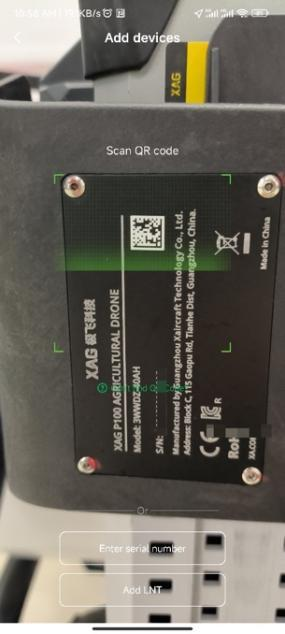
- f. Open XAG One App, go to add device and input/scan remote controller serial number, input device name and confirm
- g.Wait until the remote controller gets online; If not, kill and restart the APP
2. Pair XRTK4 to Remote Controller (RC)
- a.Update the XRTK4 firmware to the latest version. make sure the XRTK4_MCU version is over 5.6.0.22 and the Wireless Communication version is over 3.2.1.52. Offline update method is available.
- b.Turn on the remote controller, make sure the second light illuminates green, which indicates that the RC has access to IOT cloud server.
- c.long press remote controller power button to enter pairing mode, release the power button until the third light indicator flashes yellow.

- d. Turn on XRTK4, wait until the F1 light stops flashing and illuminate red.
- e.On XRTK4, short press (0.5 second) the F1 button. you will soon hear it beeps twice, which indicates that the pairing mechanism is in process.
-
f. Pairing success indication
- ACS2 2021: voice prompt “connect success”. Meanwhile, the third light becomes dim.
- ARC3 Pro: no voice prompt, but you will hear a beeping sound. Meanwhile, the third light becomes dim.
-
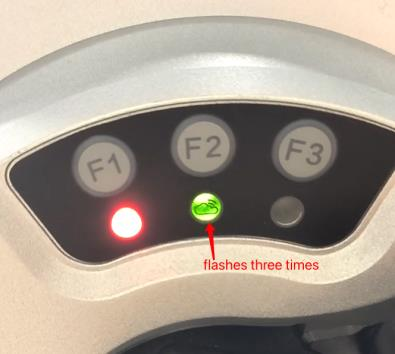
g.Wait about 5minutes, the F2 indicator will flashes three times in 1s (triple flash)
- Add XRTK4 to XAG One account
- Restart XRTK4, wait until F2 light triple flashes. This means the XRTK4 has connected to XAG IOT server through remote controller network.
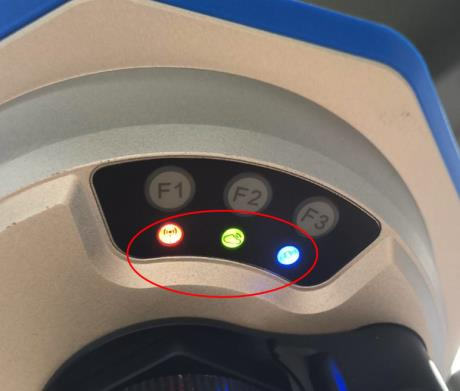
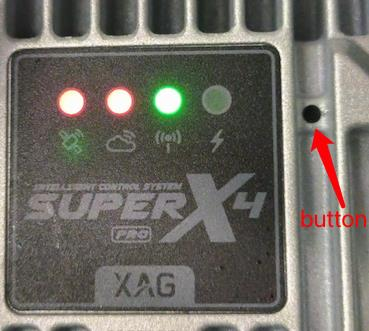
- On XRTK4, long press (2~3 seconds) F3 button to enter adding mode, wait until F1/F2/F3 are flashing simultaneously.
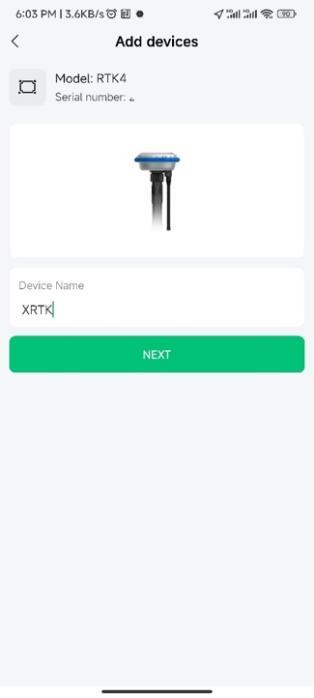
Open XAG One App, go to add device and input/scan XRTK4 serial number, input device name and confirm

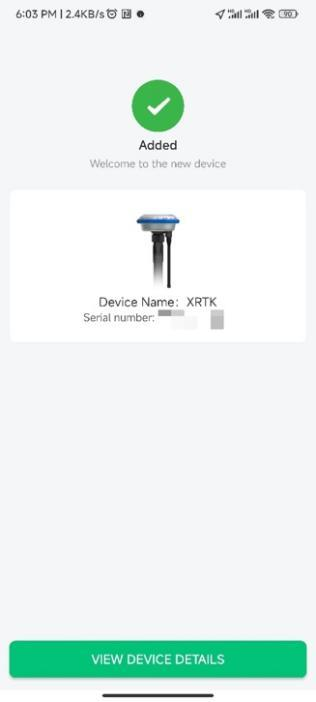
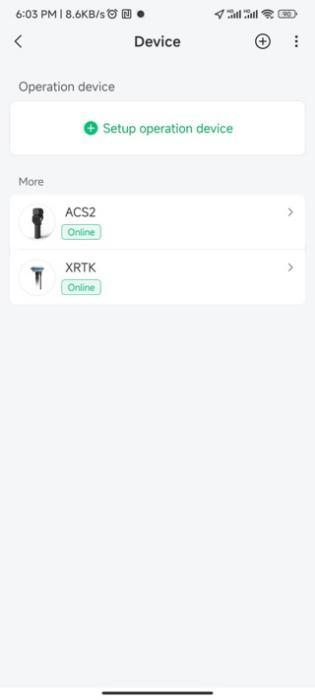
Wait until the XRTK4 gets online; If not, kill and restart the APP
You can update the XRTK4 firmware through RCN

3. Pair UAV to Remote controller (RC)
a. Update UAV to the latest firmware version
b. On remote controller- Turn on remote controller (RC)
- make sure the second light illuminates green, which indicates that the RC has internet access to IOT cloud server.
- long press and hold the remote controller (RC)’s power button, release the power button when the third light indicator is flashing yellow
c.Turn on UAV and put UAV into paring mode. There are two options.
- Option 1: long press and hold UAV battery power button,
For P100H, release the battery power button when the arm light slowly flashes yellow, and the WiFi light indicator (the third light of flight control) alternates between green and red.
For P40 EN and V40 EN, release the battery power button when the taillight slowly flashes yellow-green and the WiFi light indicator (the third light of flight control) alternates between green and red.
Option 2: Long press the reset button of flight control
For P100H, release reset button of flight control when WiFi light indicator (the third light of flight control) alternates between green and red; Arm light slowly flashes yellow.


For P40 EN and V40 EN, release reset button of flight control when WiFi light indicator (the third light of flight control) alternates between green and red; Taillight slowly flashes yellow-green.
Place remote controller (RC) close to UAV, wait for 30 seconds,
e.pair success indication
i. ACS2 2021: voice prompt “connect success”. Meanwhile, the RC third light becomes dim.
- ARC3 Pro: no voice prompt, but you will hear a beeping sound. Meanwhile, the RC third light becomes dim.
- UAV: flight control second light indicator (Cloud) flashes in green. It means that the UAV is online and connected to XAG IOT server. The UAV is ready to be added to the XAG One App account.
In case you only hear the voice prompt or the beep sound but the second light indicator (cloud) does not flashes in green, wait for 5 minutes until the Cloud services indicator flashes green
4. Add UAV to XAG One account
a.Connect smartphone to remote controller hotspot
- Open XAG One App, go to add device and input/scan UAV serial number, input device name and confirm

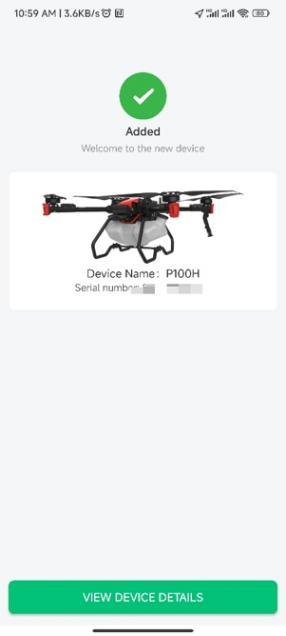
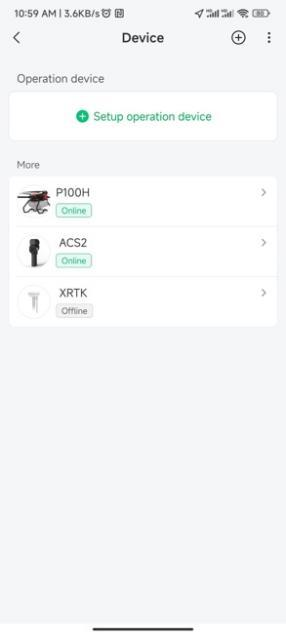
c.Wait until the UAV gets online; If not, kill and restart the APP
d. Bind UAV and remote controller
e.Restart UAV and wait for 120 seconds until the flight control second light indicator (Cloud) flashes in orange. It means that the RCN4G mode is ready.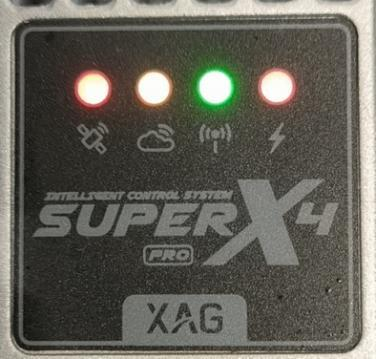
Mode switch (from Semi-Direct RCN4G to Others)
- Semi-Direct RCN4G -> Direct RCN4G, insert 4G SIM card into UAV
- Semi-Direct RCN4G -> Local RCN, remove 4G SIM card from RC
- Semi-Direct RCN4G -> RCNWiFi, remove 4G SIM card from RC and connect RC to home/office router
RCNWiFi Configuration
Use condition
No 4G network accessibility
Applicable models
P100PH/P100H/P40EN/V40EN
RCNWiFi Pairing requirement
- Remote controller (RC) has no SIM card inserted
- UAV has no SIM card inserted.
- XRTK4 has no SIM card inserted.
Operation requirement
- Remote controller (RC) has no SIM card inserted.
- UAV has no SIM card inserted.
- XRTK4 has no SIM card inserted.
Procedure: RCNWiFi pairing
1. Connect RC to local WiFi.
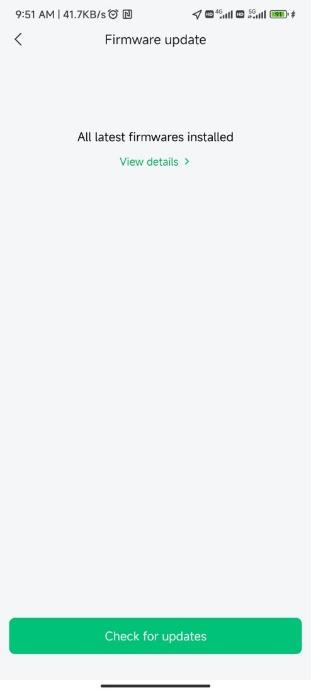
a.Make sure the firmware versions are above wlink 3.2.1.55 / ACS2_RC 2.1.1.40 (ARC3 Pro main board: 1.0.1.42.) (Offline update method available, check Chapter 3 of this manual)
- Turn on the remote controller, wait until the 3rd led of the RC turns off, indicating the RC is ready.
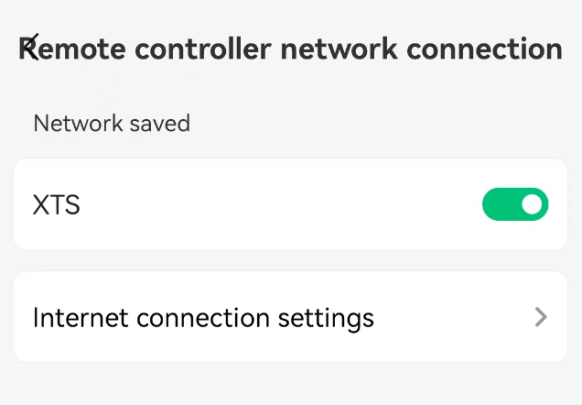
c.On XAG One App, open Me-Device page, click the 3-dot-button in the upper right corner, click RCN Mode, select Remote controller network connection, then click Wi-Fi SETTINGS.


From smartphone WLAN setting, choose ACS2 hotspot, then return to XAG One App, click Wi-Fi CONNECTED.


Click Internet connection settings, fill in hotspot ID and credentials, then click CONFIRM and CONNECT. The third light indicator of the RC will then flash yellow indicating that it has started to search and connect to wifi


3rd led Flashing yellow: pairing mode or connecting to local wifi
3rd led solid yellow: local wifi connected
2nd led off: IOT server not connected
2nd led on: IOT server connected
Wait approximately 2 minutes until ACS2 voice prompts “connected” and the 3rd led becomes solid yellow indicating successful connection to the hotspot. Wait about 5 more minutes until all the second led turns on solid green which indicates the RC is connected the IOT server. The ARC3 Pro reacts simliar but without vice prompt.
Note 1: At this moment, the smartphone will disconnect from the RC hotspot as the RC is re-configuring its wifi module. Please connect your phone to the RC hotspot again when the 3rd led becomes solid yellow.
Note 2: In case the RC prompts connection failed, or the 3rd led never stops flashing, press and hold the button “A” to terminate the connection, and perform from step a again. For ARC3 Pro, press and hold “Fn” button
Note 3: If the second led of the ACS2 never turn green, check the internet connection of the local wifi.
e. Turn on/off local wifi:
Each time remote controller reboots, the local wifi connection will be disabled automatically. To manually enable RCNWiFi, connect the smartphone with the hotspot of the RC, open the app and go to the RCN Mode configuration, turn on the Wi-Fi switch, then the RC will connect to the local wifi that was configured previously again. Wait unitl the 3rd led becomes solid yellow.

2. Add RC to user account.
For ARC3 Pro, just turn on the device, make sure it is connected to the local wifi (3rd led solid yellow) and the IOT Server (2nd led solid green). Open the XAG One app, tap the “+” on the top right corner of the screen, select “add device”. Follow the guide to scan the QR code or enter the SN of the ARC3 Pro to add it to the account.

Make sure the first 3 leds of the ARC3 Pro are all on


For ACS2, please follow the steps below:
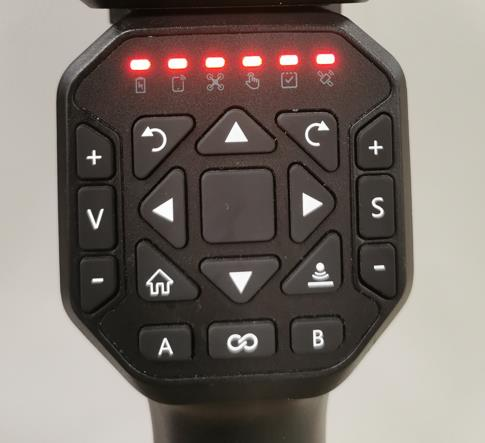
a. Turn off the RC, press and hold the power button until all the leds flashing red
Open the app and go to Me-Device page, click the 3-dot sign on the top right corner of the page and go to the RCN Mode configuration. Switch on the Wi-Fi switch, then the RC will connect to the local wifi configured previously.
Wait a while unitl the all leds flashing green indicating it has connected to the IOT server. Check internet status of the local wifi if it never turns green.
Open the XAG One app, tap the “+” on the top right corner of the screen, select “add device”. Follow the guide to scan the QR code on top of the ACS2 or enter the SN of the ACS2 Pro to add it to the account.
When the ACS2 is successfully added to the account, all the leds will become normal.

3. Pair XRTK4 to Remote Controller (RC, including ACS2 or ARC3 Pro)
a.Update the XRTK4 firmware to the latest version using offline method; Make sure that the firmware versions are above com.xa.app.wlink 3.2.1.52 / XRTK4_MCU 5.6.0.22 (offline update method available, check Chapter 3 of this manual);
- Turn on remote controller, wait until the third led turns off.
Press and hold the remote controller power button until the third light indicator flashes yellow, which indicates it has entered pairing mode
3rd led Flashing yellow, 2nd led can be off or on
- Turn on XRTK4, wait until the F1 light stops flashing and illuminate red.
- On XRTK4, short press (0.5 second) the F1 button (Note: Do NOT long press). you will soon hear it beeps twice, which indicates that it has entered the pairing mode.
- Wait until you get the pairing success indication
- ACS2 2021: voice prompt “connect success”. Meanwhile, the third light becomes dim.
- ARC3 Pro: no voice prompt, but you will hear a beeping sound. Meanwhile, the third light becomes dim.
- Add XRTK4 to XAG One account
- Switch on RC’s connection with local WiFi through XAG One app’s RCN setting
- Restart XRTK4, wait until F2 light triple flashes. This means the XRTK4 has connected to Cloud IOT server through the remote controller.
- Open the XAG One app, tap the “+” on the top right corner of the screen, select “add device”.
- Follow the guide to scan the QR code of the XRTK or enter the SN.
- On XRTK4, long press (2~3 seconds) F3 button to enter adding mode, wait until F1/F2/F3 are flashing simultaneously. If it does not work, restart XRTK4 and wait for 2 minutes.


f. Add XRTK4 into XAG one account
Pair UAV to Remote controller (RC) a.On remote controller
- Turn on remote controller (RC) , wait until the third led turns off..
- Press and hold the remote controller (RC)’s power button until the third led flashing yellow.
Turn on UAV, press and hold UAV battery power button until the WiFi indicator (the third light of the flight control) alternates between green and red; Arm light or tail light slowly flashes yellow. Place remote controller (RC) close to UAV, wait for 30 seconds, b.
Wifi led flashes between green and red, system led flashes in yellow c.pair success indication
- ACS2 2021: voice prompt “connect success”, the RC third light turns off.
- ARC3 Pro: no voice but a beeping sound. the RC third light turns off.
- UAV: flight control third light indicator (WiFi) flashes in green, and system led comes back normal. It means that the UAV has entered the RCN mode.
Add UAV to XAG One account
- Switch on RC’s connection with local WiFi through XAG One app’s RCN setting
- Place the drone in an open space, power on the drone, wait until the second led of the FC (cloud led) flashes in orange. This means the FC has connected to Cloud IOT server through the remote controller.

Cloud led flash in orange
- Open the XAG One app, tap the “+” on the top right corner of the screen, select “add device”.
- Scan the QR or enter the SN of the drone, follow the guide to add UAV to XAG One account
Bind UAV and remote controller
Mode switch (from RCNWiFi to Others)
- RCNWiFi -> Direct RCN4G, insert 4G SIM card into RC and UAV
- RCNWiFi -> Semi-Direct RCN4G, insert 4G SIM card into RC
- RCNWiFi -> Local RCN, disconnect connect RC to home/office router