.png?height=120&name=Pegasus%20Robotics%20Logo%20-%20Portait%20(2).png)
Hello everyone, welcome to XAG Academy.
When you face thousands of acres of large plots and complex terrain such as mountains and hills, you can use RealTerra to obtain 3D high-definition maps, so that you can easily plan plots on the app, so that later operations can fly safely and smoothly.
(High Definition Diagram)
01 Lecture: What is RealTerra?

RealTerra is an execution system that can be mounted on XAG agricultural unmanned aircraft, and cooperates with unmanned aircraft to conduct aerial survey of land plots, helping users complete complex farmland surveying and mapping work more efficiently, quickly put into actual operations, save time and effort, and upgrade benefits.
There are 4 main features of RealTerra
Feature 1: P100 Pro can map up to 200 mu of field in one takeoff and landing, and quickly splicing drawings on the ground to improve surveying and mapping efficiency;
Feature 2: Through the one-hand/dual-hand control WIFI function, the results of the high-precision map can be transmitted to the XAG Agricultural Service App, even in the environment of poor network;
Feature 3: The 2 million high-pixel camera equipped with the XFLIX 0.1200 is still clearly visible even when flying at an altitude of 30 meters; In addition, the physical anti-shake mechanism is added, which also reduces the image quality impact caused by unmanned aircraft shake during flight and improves the quality of farmland surveying and mapping.
Feature 4: High-precision maps can be shared with one click, making team collaboration more convenient.

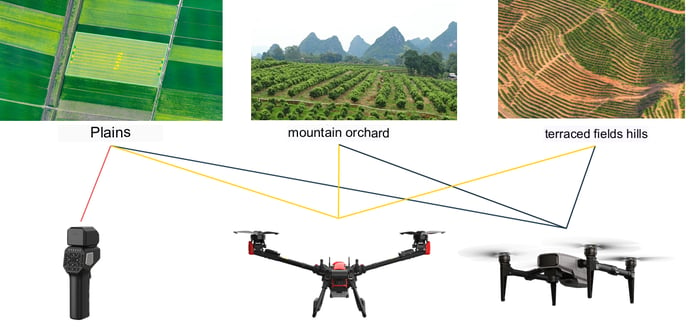
There are three main surveying and mapping tools: RealTerra, one-handed control, and extreme hero, but the applicable scenarios are different. As you can see from the figure below, one-handed control will be more suitable for small plain plots, while RealTerra and Jixia will be more practical for large plain plots, mountain orchards and terraced hills and other complex terrain.
Lecture 02: How to install RealTerra
RealTerra 2.0 can be installed on P100 Pro and V50 Pro drones, the installation process is the same, but the tripod and installation details are slightly different, please see the specific process below:
Step 1: Check RealTerra
Check the camera lens, if there is dirt, water mist, or blocked by the connecting line, it needs to be cleaned up in time, otherwise it will affect the image rate or cannot be formed.

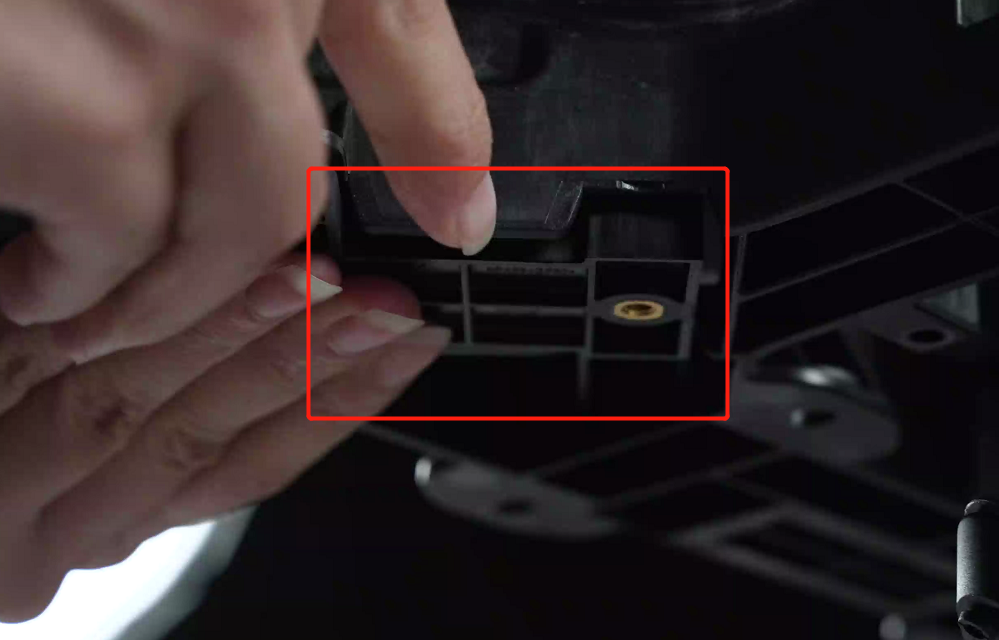
Step 2: Assemble the Radiant
- Place the tripod into the Rito assembly retention slot.

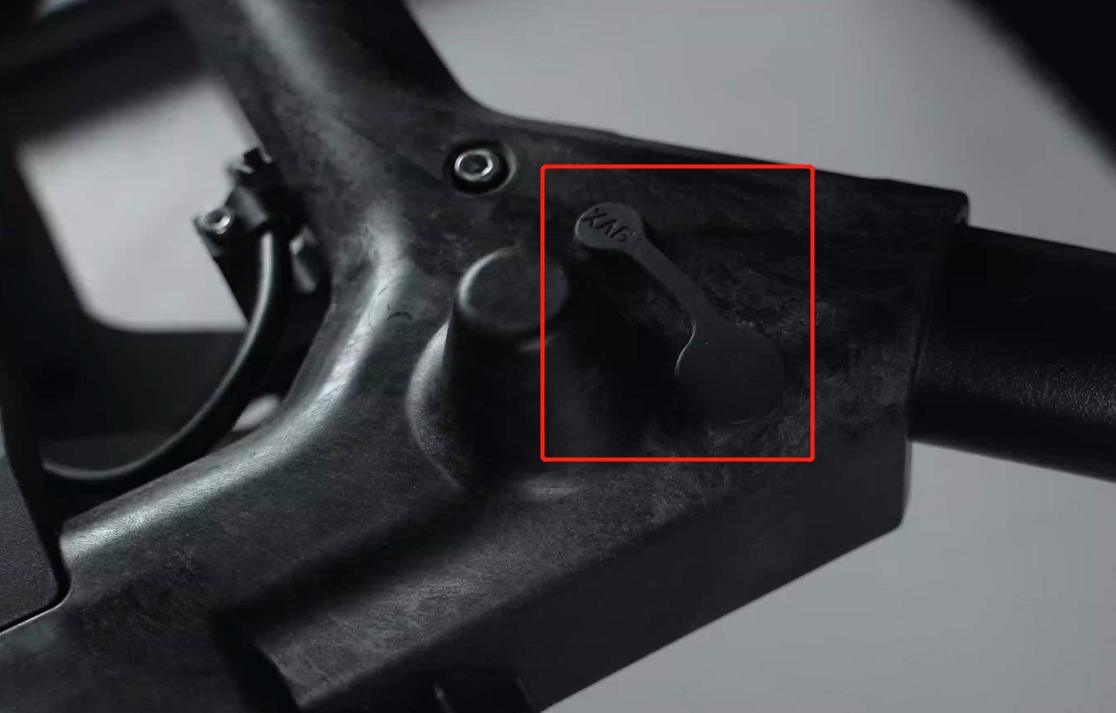
3. Plug the screw hole with "load frame glue".
Step 3: RealTerra is fixed with the unmanned aircraft.
The P100 Pro "RealTerra" parts are fixed to the fuselage, and the body retaining buckle is locked (one on the left and right).
With the nose of the drone in the positive direction, the P100 Pro is mounted in an oblique forward direction, and the Reto feeder and Reto mounting logo (P and arrow) are on the left.
.png?width=688&height=361&name=Add%20a%20heading%20(5).png)
The V50 Pro "RealTerra" parts are fixed to the fuselage, and the body fixing buckle is locked (two in the nose direction and one in the tail direction).
With the nose direction of the drone as the positive direction, the V50 Pro is mounted in an oblique backward direction, and the Reto feeder and Reitu mounting logo (V and arrow) are on the left.
.png?width=688&height=334&name=Add%20a%20heading%20(6).png)
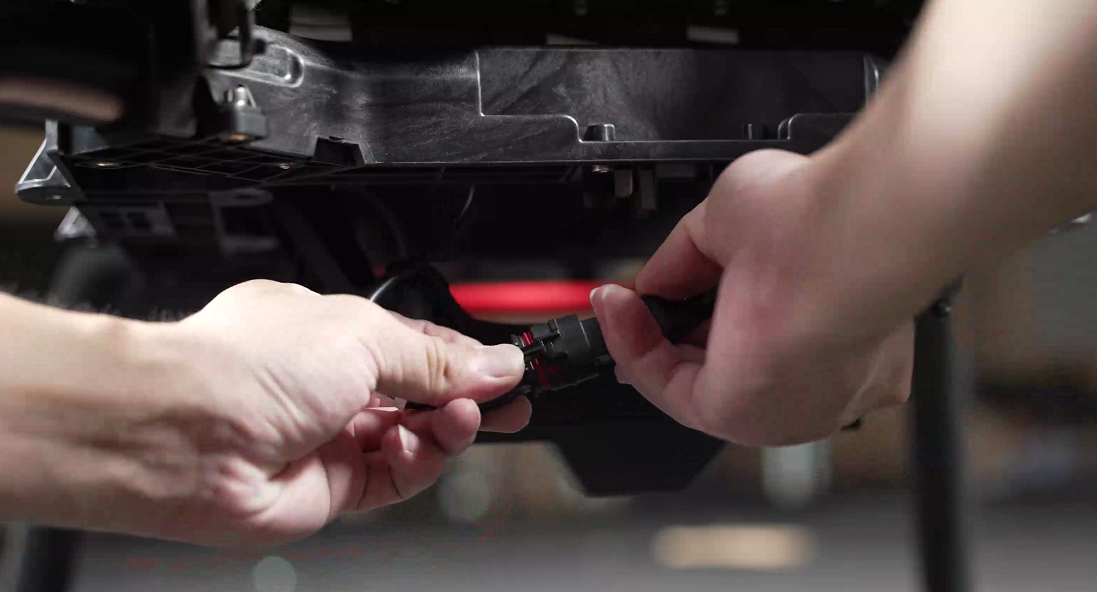
Step 4: Connect the feeder of the Rito module with the <>pin mounting cable of the body, and place the feeder on the left side of the Rito installation logo to complete the installation of the Rito device.
Step 5: Open XAG Agricultural Service App and agricultural unmanned aircraft, enter "My" - "Equipment" on the App, set the unmanned aircraft as "Operation Equipment", return all the way to the initial interface, and then enter the "Operation" interface, and see the display icon in the status bar of the operation interface, which means that the RealTerra module has been successfully installed.![]()
After installing RealTerra, if you want to perform aerial surveys, be sure to check the take-off and landing points, appearance and systems of the unmanned aircraft. For details, please see "Pre-flight Inspection of 2023 P/V Agricultural Unmanned Aircraft" at the end of the article.
Lecture 03: How to use RealTerra for aerial survey
There are four main steps in the aerial survey of RealTerra, which are drawing the operation area, setting parameters, executing the operation, and saving the high-definition map.
Before formally learning the use of RealTerra, please think about these 4 questions:
Question 1: When drawing an aerial survey area, if the parcel is polygonal, how should it be drawn?
Question 2: Mountain orchards have a slope of more than 30 degrees, how to achieve the best mapping results?
Q3: How do I transfer the generated HD image to the App when the network is weak?
Question 4: How should aerial survey be carried out in two different terrains: mountains and plains?
Next, please enter the learning of the operation process of RealTerra with questions and thoughts, and I will answer the above questions while teaching you the process steps.
Step 1: Draw the job area
1.Open the "XAG Agricultural Clothing" App, click "Operation" - "Start Aerial Survey" after the border turns green, and click "Start Aerial Survey";
2. Select "New High-Definition Map", select "Surveying and Mapping Type" on the satellite map, click the area to be surveyed, and after the boundary point of the mapping area is drawn, click the first boundary point to ensure that the surveying and mapping area is closed;
3. Click "Next" in the upper right corner, modify the name of the mapping area, and click "Finish" to return to the "Perform Aerial Survey" interface..png?width=688&height=403&name=Add%20a%20heading%20(13).png)
So, if the parcel is polygonal, how should the work area be drawn?
Everyone remembers the principle that no matter what shape the operation plot is, you only need to draw a square or rectangular mapping area containing the operation plot, take-off and landing route, and take-off and landing points. This kind of planning will not only improve the speed of aerial survey, but also make the high-precision map rendering effect reach the best state.
Step 2: Set the parameters according to the terrain
The flight altitude (30 meters) and flight speed of Rito aerial survey are the default of the system, and the parameter settings focus on the type of aerial survey, obstacle avoidance function and ground imitation function.
The types of aerial survey are mainly divided into two types: [Mountain Mode] and [Plain Mode].
If you are conducting aerial survey on plain terrain, you can directly select [Plain Mode];
If you are conducting aerial survey in mountainous terrain, you must select the aerial survey type according to the following situations:
Scenario 30: If the difference between mountains or crops is less than <>°, as shown in the figure below, this type of hill pack.

You can take off and land at the foot of the mountain or halfway up the mountain, click [Settings], select the aerial survey type as [Mountain Mode], turn on [Obstacle Avoidance], and the system will turn on [Imitation Flight] by default.
.png?width=688&height=638&name=Add%20a%20heading%20(12).png)
Scenario 30: If the difference between mountains or crops is greater than <>°, as shown in the figure below.
It is strongly recommended to take off and land directly on the top of the mountain, the aerial survey type can be selected as [plain mode], no need to open [imitation flight], which can enable the unmanned aircraft to fly at a fixed altitude 30 meters above the take-off and landing point, and operate at the top of the mountain, the network signal will be better, which is conducive to the upload of high-definition map results.

Note: After completing the parameter setting, during the flight, you need to pay attention to whether there are obstacles such as wires in this route, and pay attention to avoidance.
Step 3: Execute the job
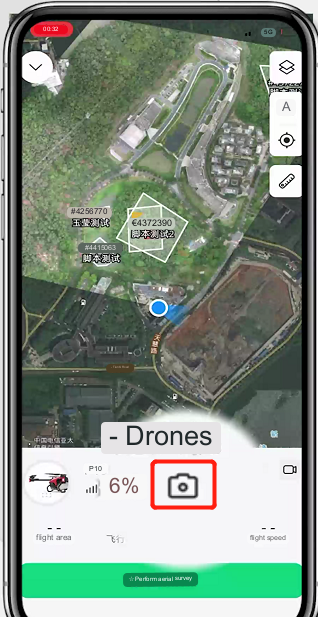
Click "Perform Aerial Survey" to start the operation. If you encounter sudden or abnormal situations during the flight, you can click "Hover" under the aerial survey progress, or "Return to Home" or "Forced Landing" in more operations, and the App will send emergency commands to control the unmanned aircraft.
.png?width=688&height=627&name=Add%20a%20heading%20(11).png)
Step 4: Save the high-definition diagram
2.After the high-definition diagram is generated, click "Finish" in the upper right corner to save the high-definition diagram.
.png?width=688&height=694&name=Add%20a%20heading%20(10).png)
When you have a weak network, if the system is unable to complete the high-definition map synthesis and upload it to the mobile phone, the system will prompt as follows:
- Prompted to use one-handed direct pass, select "Continue";
- In the system settings of the mobile phone, connect the one-hand hotspot "ACS 123456";
.png?width=688&height=508&name=Add%20a%20heading%20(9).png)
Lecture 04: Planning Work Plots on High-Definition Maps:
The first step is to create a new plot
On the "Plot" interface of the "XAG Agricultural Uniform" app, click the layer icon in the upper left corner, select "High-Definition Map", and select the desired high-definition map. Click on the "+" sign in the upper right corner and select "New Plot".
.png?width=688&height=700&name=Add%20a%20heading%20(14).png)
The second step is to plan the plot
2. Pay attention to the dot record every corner of the boundary, the arc boundary is more dotted, the boundary line can not cross, when there are obstacles in the plot boundary, multiple boundary points can be recorded to wrap the obstacle around the plot.
.png?width=688&height=454&name=Add%20a%20heading%20(8).png)
The third step is to save the plot
After the plot mapping is completed, click "OK" in the upper right corner to complete the plot information, and click "Finish" to save the plot.
.png?width=688&height=678&name=Add%20a%20heading%20(7).png)
Course Summary
This lesson focuses on understanding the characteristics of RealTerra, the difference between RealTerra and other surveying and mapping tools, how to use RealTerra for aerial surveying, common problems and solutions in aerial survey, how to use high-precision map for land planning and other knowledge points, I hope this course can quickly get started with RealTerra.
That's all for this course, if you have gained, I hope you can share this course with your friends.